Eco-Friendly Pet Barriers for Cars | CarInteriorMix
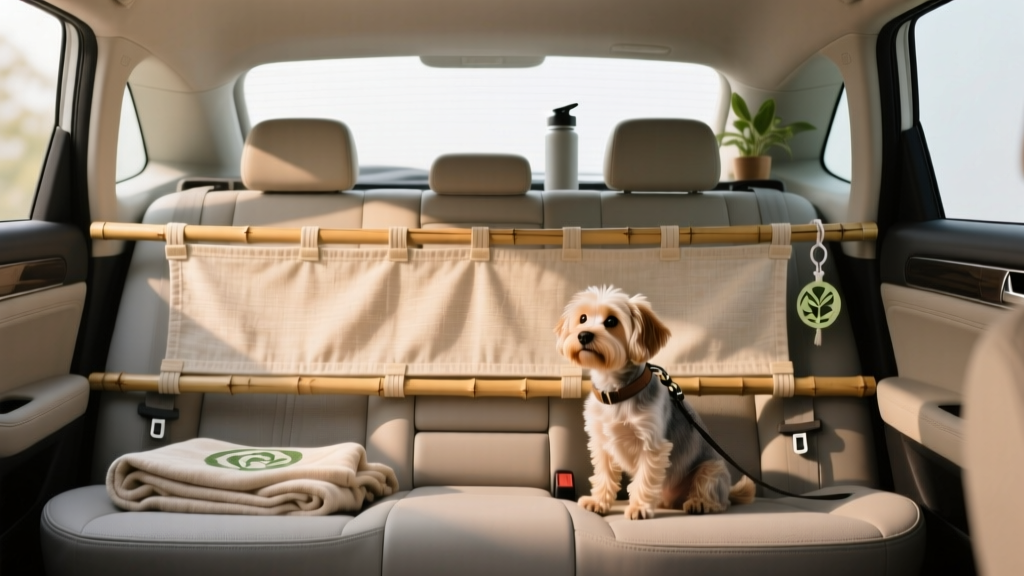
If you travel with a dog (or two), a pet barrier quickly becomes one of those ?why didn?t I do this sooner?? upgrades. It helps keep your pet safely in the rear area, reduces driver distraction, and protects seats, door panels, and trim from claws and fur. The catch: many popular barriers and installation methods rely on plastic-heavy parts, foam adhesives, and disposable hardware that doesn?t age well?and often ends up in the trash after a season of use.
This guide focuses on eco-friendlier installation alternatives for pet barriers, building on the idea that ?green? doesn?t have to mean flimsy or complicated. You?ll learn how to install barriers using reusable hardware, low-VOC materials, and clever vehicle-friendly mounting strategies that avoid drilling or permanent changes. The goal is a setup that?s safe, secure, and easier to maintain?without turning your interior into a project car.
Whether you drive a compact hatchback, a family SUV, or a wagon with a cargo area your dog considers home base, these options can reduce waste, protect your car?s interior, and still meet the real-world demands of daily driving.
What ?Eco-Friendly? Means for Pet Barrier Installations
Eco-friendly pet barrier installation is less about a single magic material and more about smarter choices:
- Reuse over replace: Choose mounting systems you can move to your next vehicle or reconfigure as needed.
- Low-VOC, low-odor materials: Especially relevant in a small cabin that heats up in summer.
- Interior-safe contact points: Reduce the risk of damaging plastics, leather, headliners, and trim?damage often leads to replacements (waste) and costly repairs.
- Minimal packaging and consumables: Avoid one-time-use adhesive pads, zip ties, and plastic clips when practical.
- Long service life: A slightly more expensive, durable barrier is often the greener choice long-term.
Alternative Installation Methods (No Drilling, Less Waste)
1) Headrest-Post Mounting Systems (Reusable and Interior-Friendly)
Headrest-post mounting is one of the most vehicle-friendly methods because it uses existing structural points (headrest supports) without adhesives or permanent fasteners. Many adjustable mesh barriers and some metal barriers use straps, buckles, or clamp-style mounts that attach to front or rear seat headrest posts.
Why it?s eco-friendlier: reusable straps and hardware, no drilled holes, minimal consumables.
Step-by-step: Installing a headrest-post mounted barrier
- Pick the barrier position: Most owners install behind the front seats (keeps pets in the back seat/cargo area). Some install behind the second row in 3-row SUVs.
- Raise headrests slightly: Create clearance to loop straps or position clamps around the posts.
- Align the barrier: Center it left-to-right. Ensure it won?t block rear HVAC vents you rely on for your pet?s comfort.
- Attach upper mounts: Wrap straps around headrest posts or secure clamp brackets. Avoid routing straps across sharp plastic edges.
- Attach lower anchors: Depending on model, connect to seat frame points, child seat anchor locations (if compatible), or lower straps around seatbacks.
- Tension evenly: Tighten straps in small increments so the barrier stays centered and doesn?t twist.
- Safety check: Push forward on the barrier firmly. It should resist a realistic ?dog jump? without slipping.
Real-world tip: If your dog leans hard into barriers, choose a model with non-stretch webbing (many elastic straps feel secure at first but gradually creep).
2) Cargo Tie-Down / D-Ring Anchor Installation (Using Existing Hardware)
Wagons, SUVs, and crossovers often have factory cargo tie-downs or D-rings. These are ideal anchor points for eco-friendly installs because you?re using hardware the vehicle already has?no new holes, no adhesives.
Best for: cargo-area barriers, tailgate netting, or combo setups that block access to rear seats.
Step-by-step: Installing with factory cargo anchors
- Locate anchor points: Find D-rings or tie-down loops in the cargo floor and sidewalls.
- Choose reusable connectors: Use metal carabiners (locking preferred) or stainless-steel snap hooks instead of disposable zip ties.
- Set barrier height: Attach the top portion to upper anchor points or to rear headrest posts if needed.
- Attach the lower portion: Clip into cargo D-rings with short straps to keep the barrier from riding up.
- Adjust tension: Aim for taut, not over-tight. Over-tension can stress plastic trim around anchors.
- Check hatch clearance: Close the tailgate/hatch slowly the first time to ensure nothing binds or rubs.
Practical example: If you drive a compact SUV and your dog rides in the cargo area, anchoring a mesh barrier to two rear headrest posts and two cargo D-rings creates a stable ?wall? that won?t swing when you corner.
3) Clamp-On Frame Barriers (Strong, Long-Life Alternative)
Clamp-on barriers are typically metal (steel or aluminum) and use adjustable bars and brackets that press against interior surfaces or attach to seat structures. When designed well, they can be a long-life solution you move from vehicle to vehicle.
Eco angle: a durable metal barrier that lasts years can be greener than repeatedly replacing cheaper plastic units.
- Look for: powder-coated steel, replaceable rubber pads, and fully serviceable hardware (standard hex bolts, not proprietary clips).
- Avoid: clamp feet with hard plastic contact points that can mar interior panels.
Step-by-step: Installing a clamp-on barrier without damaging trim
- Clean contact areas: Wipe down trim where pads will touch using a mild interior cleaner.
- Add protective pads: Use reusable rubber or silicone furniture pads (low-odor) if the barrier pads are too small or firm.
- Expand the frame: Adjust width and height in small steps, keeping the barrier centered.
- Snug, then test: Tighten until secure, then push/pull aggressively. If it shifts, re-center and tighten slightly more.
- Re-check after 1 week: Temperature changes can loosen fittings; a quick re-torque helps.
4) Sustainable Webbing + Buckle ?Soft Barriers? (Lightweight and Packable)
Soft barriers are usually heavy-duty mesh plus webbing straps. They?re great when you need something that installs quickly, stores easily, and doesn?t rattle. For a greener setup, prioritize models made with recycled polyester webbing or robust, repairable stitching.
Tip for longevity: Choose barriers with metal cam buckles or high-quality acetal hardware; cheap buckles are the first failure point.
Eco-Materials and Add-Ons That Make Installations Greener
Reusable Hardware Upgrades
- Stainless steel or aluminum carabiners: Replace disposable ties for anchor connections.
- Hook-and-loop cable wraps: Better than zip ties for managing loose straps.
- Replaceable rubber pad kits: Extend the life of clamp-on barriers.
Low-Odor Interior Protection (Better Than One-Time Adhesives)
- Silicone edge guards: Prevent strap abrasion on trim edges and reduce squeaks.
- Reusable microfiber wrap: Wrap around a contact bar to prevent scuffs and reduce vibration noise.
- Rubberized non-slip mat strips: Under barrier feet or base rails for extra stability.
Product Recommendations and Comparisons (What to Look For)
Rather than chasing a single ?best? pet barrier, match the design to your vehicle layout and how your pet behaves in motion.
Best for durability: Powder-coated metal barrier with serviceable hardware
- Ideal use: large dogs, frequent highway driving, long ownership horizon.
- What to look for: adjustable width/height, replaceable pads, standard fasteners, minimal plastic joints.
- Tradeoff: heavier, typically higher cost, may reduce rear visibility depending on design.
Best for daily flexibility: Heavy-duty mesh barrier with recycled fabric options
- Ideal use: mixed passenger/cargo needs, frequent removal, smaller dogs.
- What to look for: reinforced stitching, non-stretch webbing, multiple anchor straps, low-noise mesh.
- Tradeoff: less rigid under heavy impact; may sag if not tensioned correctly.
Best for wagons/SUV cargo areas: Anchor-based system using factory D-rings
- Ideal use: dog rides in cargo area, you want a clean install with no drilling.
- What to look for: short adjustable straps, locking connectors, abrasion protection where straps touch trim.
- Tradeoff: depends on vehicle having accessible anchor points.
Common Mistakes to Avoid
- Over-tightening straps or clamps: This can deform plastic panels, leave pressure marks, or stress mounting points.
- Blocking side curtain airbags: Never route straps or mounts across airbag deployment paths (often along the roofline and A/B/C pillars).
- Using brittle, cheap connectors: Low-quality plastic clips can crack in heat/cold cycles, especially in sunny cabins.
- Anchoring to weak trim pieces: Avoid hooking to seatback pockets, flimsy cargo covers, or decorative plastic rails.
- Ignoring pet behavior: A barrier that works for a calm senior dog may fail with an anxious jumper. Test realistically.
- Skipping the ?rattle check?: Loose fittings create noise. Noise leads to frustration, which leads to removal and wasted purchases.
Practical Tips for a Cleaner, Longer-Lasting Install
- Do a heat-cycle retighten: After a few hot/cold days, re-check strap tension and fastener torque.
- Add abrasion guards: Wherever a strap touches trim, add a small silicone sleeve or microfiber wrap.
- Choose dark, UV-stable materials: Sunlight through rear glass fades cheap webbing and makes plastics brittle.
- Keep it washable: Barriers with removable covers or wipe-clean surfaces stay in service longer.
- Pair with a seat protector or cargo liner: A barrier controls movement; a liner handles hair, mud, and drool?together they reduce wear on factory upholstery.
FAQ: Eco-Friendly Pet Barrier Installation Alternatives
Can I install a pet barrier without drilling into my car?
Yes. Most owners can use headrest-post straps, factory cargo D-rings, or clamp-on designs. These methods are secure when properly tensioned and positioned, and they?re typically more interior-friendly than drilling.
Are metal barriers always ?greener? than mesh barriers?
Not always. Metal barriers can be very eco-friendly if they last for years and use replaceable pads/hardware. Mesh barriers can also be a strong choice if they?re durable, repairable, and made with recycled fabrics. The greener option is usually the one you won?t replace.
What?s the safest place to mount a barrier?
Behind the front seats is common because it keeps pets away from the driver and center console. In SUVs with a dedicated cargo area, mounting behind the second row can work well. Prioritize mounts that connect to structural points like headrest posts or factory anchors.
Will a barrier damage my headliner or trim?
It can if straps rub on sharp edges or if clamps press against delicate panels. Use protective sleeves, avoid over-tightening, and make sure mounts rest on solid surfaces. A quick weekly check helps catch movement before it scuffs anything.
Can I use child seat anchors (LATCH) for a pet barrier?
Some soft barriers can share attachment zones near LATCH points, but avoid loading LATCH anchors directly unless the barrier manufacturer explicitly approves it. When in doubt, use cargo D-rings, seat frame points, or headrest posts instead.
How do I reduce rattles with a metal barrier?
Add thin rubber or silicone pads at contact points, wrap crossbars with microfiber where they touch trim, and ensure all fasteners are snug. Also check that the barrier isn?t lightly tapping a plastic panel over bumps.
Next Steps: Build a Safer, Greener Setup
Start by choosing an installation method that uses what your vehicle already gives you?headrest posts and cargo tie-downs are the easiest eco-friendly wins. Upgrade the small stuff (reusable connectors, protective pads, abrasion sleeves), then test the barrier the way your dog actually behaves: jumping, leaning, and shifting during turns. If anything slips, re-center, re-tension, and protect the contact points before the interior shows wear.
Once your barrier is dialed in, pair it with a quality seat cover or cargo liner and you?ll have a pet-friendly interior setup that?s cleaner, quieter, and more sustainable over the long run.
Want more practical car interior guides? Browse the latest on carinteriormix.com for pet travel setups, detailing tips, upholstery protection ideas, and smart upgrades that keep your cabin looking new.